Modding the Bloggie Panoramic Lens Accessory
26 June 2010 / projectThis post explains how to achieve full 1080p video with the Sony Bloggie’s 360-degree video accessory. It also illustrates some of the limitations you will encounter in doing so.
In my previous blog post about panoramic imaging with the Bloggie, I complained about how the Bloggie automatically lowers its resolution from 1920×1080 down to 1280×720 when the panoramic lens accessory is fitted onto the camera. Happily, Jan Martin from DIY-streetview.org helpfully pointed me to this short post by onezebra1 on the PanoTools discussion board, which describes how to modify the accessory to support full-resolution video recording with the Bloggie. As we had suspected, the Bloggie uses a magnet to trip the resolution switch. Removing this magnet is easy, and produces the desired result — annular panoramic video at the device’s highest possible resolution — with some caveats.
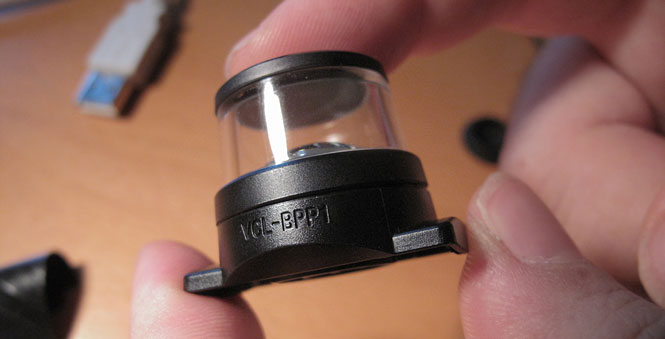
Here’s the Bloggie’s panoramic lens accessory, Sony Part Number X25467051, labeled VCL-BPP1 on its body. On the underside of the accessory are 4 very small cross-head screws (not pictured):
Removing these four screws allows the optics to be separated from the mounting base. Once separated, you will find two small rare-earth magnets inset into the the inner (upper) surface of the base. These magnets (each about 3x4mm) can be extracted with a small flat screwdriver. The photo below shows the inner surface of the base. At the bottom right of the photo is the optics half of the assembly.
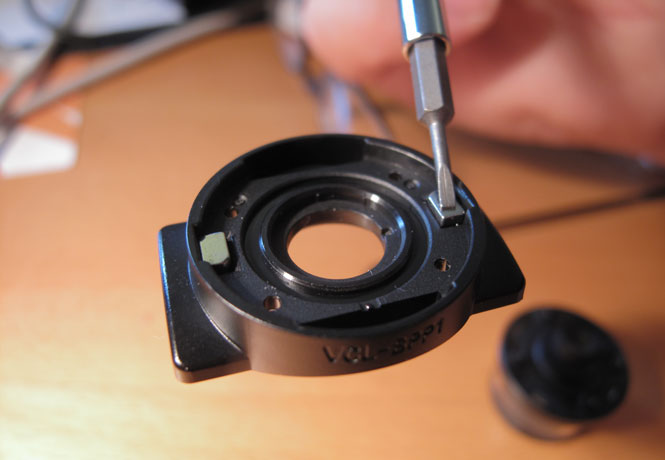
It turns out that only the left magnet needs to be removed for the hack to work. I recommend doing this to preserve maximum flexibility for your optics.
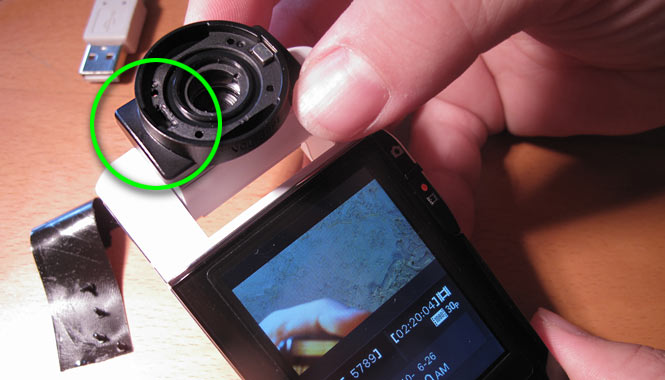
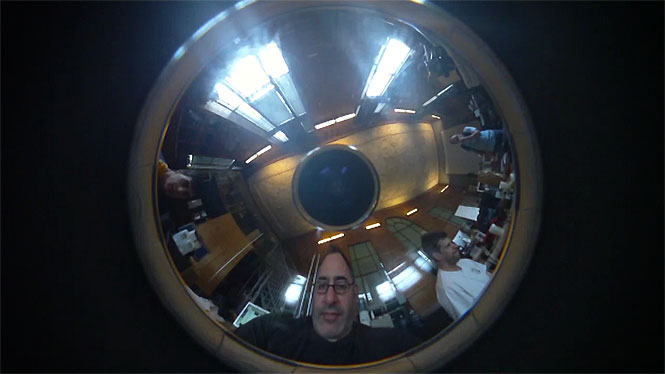
The optics are reassembled and fit onto the camera as before, and voilà — panoramic video at 1080p resolution on the Bloggie:
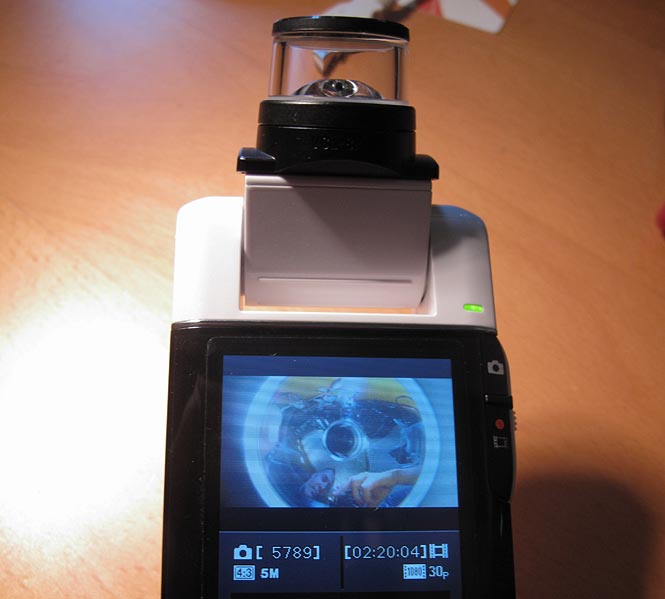
There is, however, an important caveat. The panoramic donut is now truncated on the top and bottom, as you can see above. Here is a still frame from the 1920×1080 video recorded in this way.
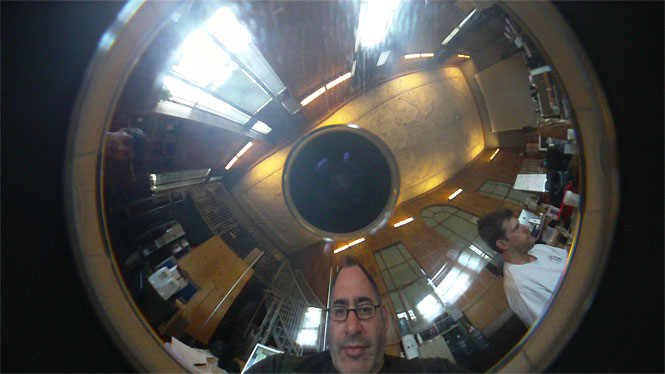
For comparison, below is a still from a video recorded in 1280×720 resolution; as you can see, the entire donut is visible. I had left one of the magnets installed, so I just flipped the same lens around to produce this. But it’s also possible to recover the Bloggie’s factory-standard 720p panoramic video behavior by selecting 1280×720 resolution from its menu system.
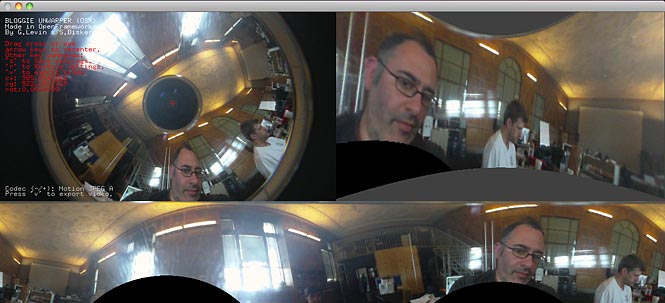
Using the 1080p-resolution annular videos with my BloggieUnwarper software is straightforward. (The MAXR_FACTOR and MINR_FACTOR properties must be set to approximately 1.2648 and 0.3018, respectively.) Below is a screenshot, which shows how the truncated regions are interpreted by the rectification process. For what it’s worth, these missing regions account for 6.8% of the area of the unwarped panorama.
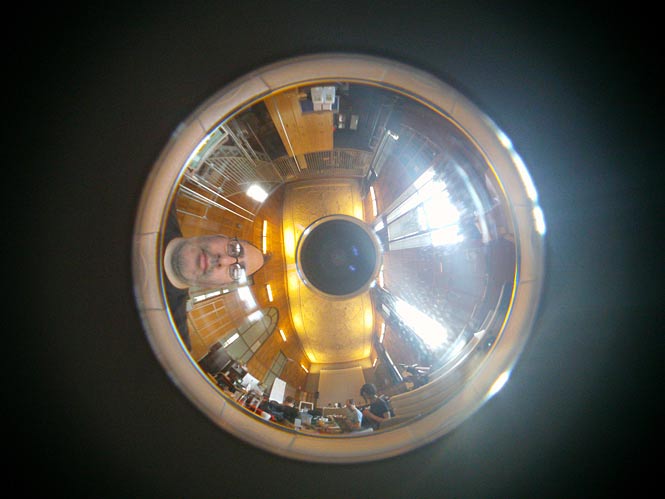
By the way, it’s worth clarifying that the Bloggie’s still images remain unaffected by this modification; the operation described above only affects the camera’s video recording capabilities. Below is a panoramic still shot at the Bloggie’s highest resolution (2592×1944). The annulus has the same dimensions as the 1920x1o80 video, but without the cropping. Both unmodified and modified optics will produce such still images on the Bloggie. The image quality is much clearer, probably because of a longer exposure time and different compression configurations.
After making some more careful measurements, I’ve determined that the maximum vertical resolution obtainable from the Bloggie’s standard 1280×720 video is ~261 pixels, while the maximum obtainable from the 1920×1080 video is ~518 pixels. So it may be worth making the mod, if you can tolerate missing about 6.8% of your pixels in a couple of places. [Photography: Kyle McDonald]
11 Responses to “Modding the Bloggie Panoramic Lens Accessory”
Open-Source Panoramic Video: Bloggie + OpenFrameworks & Processing» Next post: Rectified Flowers
June 26th, 2010 at 12:14 pm
Aha, 2592×1944 is the uncropped, unscaled sensor size… now it makes sense. The 1280×720 must be a binned version of that 2592×1944 / 2 = 1296×972, drop some pixels on the left and right, and a bunch from the top and bottom, and you’re done.
June 26th, 2010 at 1:35 pm
[…] then wrote a follow up on the magnet hack. He sure does have a lot of nice pictures. This entry was posted in News, video. Bookmark the […]
June 26th, 2010 at 1:39 pm
Hi Golan,
nice article.
I just published a posting describing how to unwrap the doughnut shaped video using ImageMagick on Ubuntu Linux:
http://www.diy-streetview.org/2010/06/26/sony-bloggie-hacked
Jan
June 28th, 2010 at 4:47 pm
Any word on wether 1280×720 60fps is also possible/uncropped via this hack? Thanks for the Unwarper app. Many sweet pano videos ahead.. =)
June 30th, 2010 at 1:11 pm
Hello
Thanks for the infos on this
I will try it
But now I can’t find the Unwarapper for download … It seems that this link below is broken giving a 404 error:
http://www.flong.com/blog/2010/wp-content/uploads/2010/06/BloggieUnwarpOF.zip
Where else can I get this ?
THANKS a lot
AYRTON
July 1st, 2010 at 7:12 am
[…] Source : Flong.com […]
July 4th, 2010 at 4:30 am
[…] in un panorama classico era disponibile solo per Windows. Per questo motivo ha deciso di scriversene uno partendo da zero da rilasciare come open source. Il programma, BloggieUnwrap, è in grado di […]
July 4th, 2010 at 6:06 am
[…] in un panorama classico era disponibile solo per Windows. Per questo motivo ha deciso di scriversene uno partendo da zero da rilasciare come open source. Il programma, BloggieUnwrap, è in grado di […]
July 4th, 2010 at 2:30 pm
Based upon your great write-up I bought the full Bloggie and 360 panorama lens setup. I got it yesterday, made two quickie panorama movies with the stock system (ie: as it came) and am right now performing the surgery to remove one of the magnets. **ISSUE** Man! I have popped the lens apart and can see easily see the magnets but I’m having trouble getting the either of them out — I don’t know if they are glued in or what but I’m about to break the tip off my (cheapo) jeweler’s flat-head screwdriver I’m using to pry. Any advice?? Did anyone else have trouble getting the magnet out?? Thanks for the GREAT hack!
July 4th, 2010 at 7:16 pm
Jeff, I was able to extract the magnets with a small screwdriver. They didn’t seem to be glued in, just pressure-fit into a zero-tolerance recession. Good luck.
g
July 5th, 2010 at 1:25 pm
Okay, I finally got one of the little magnets out but, boy!, it was a struggle. It was really wedged in there and since it was fairly flush there was pretty much nothing to grab a hold of. I had to kind of mangle both the magnet and the plastic casing around it in order to be able to get under the magnet to pry it up — the good news is that, if one chooses their direction of attack correctly, there is no real penalty to wrecking the plastic. My next struggle is to get the screws back on — they are VERY small and my cheapo jewelers screw-driver set is baaaarely up to the task. Lesson learned: I’ve already put in my Amazon order for a decent set of micro screw-drivers. Thanks for the idea and help! :-) Jeff